Plugins are a great way to expand the capabilities of your editor. Photopea has more than 40 plugins that you can use to do everything from adding emojis to generating energy effects. The following is a step-by-step guide to installing and using plugins in Photopea.
Step 1: Open Plugins Menu
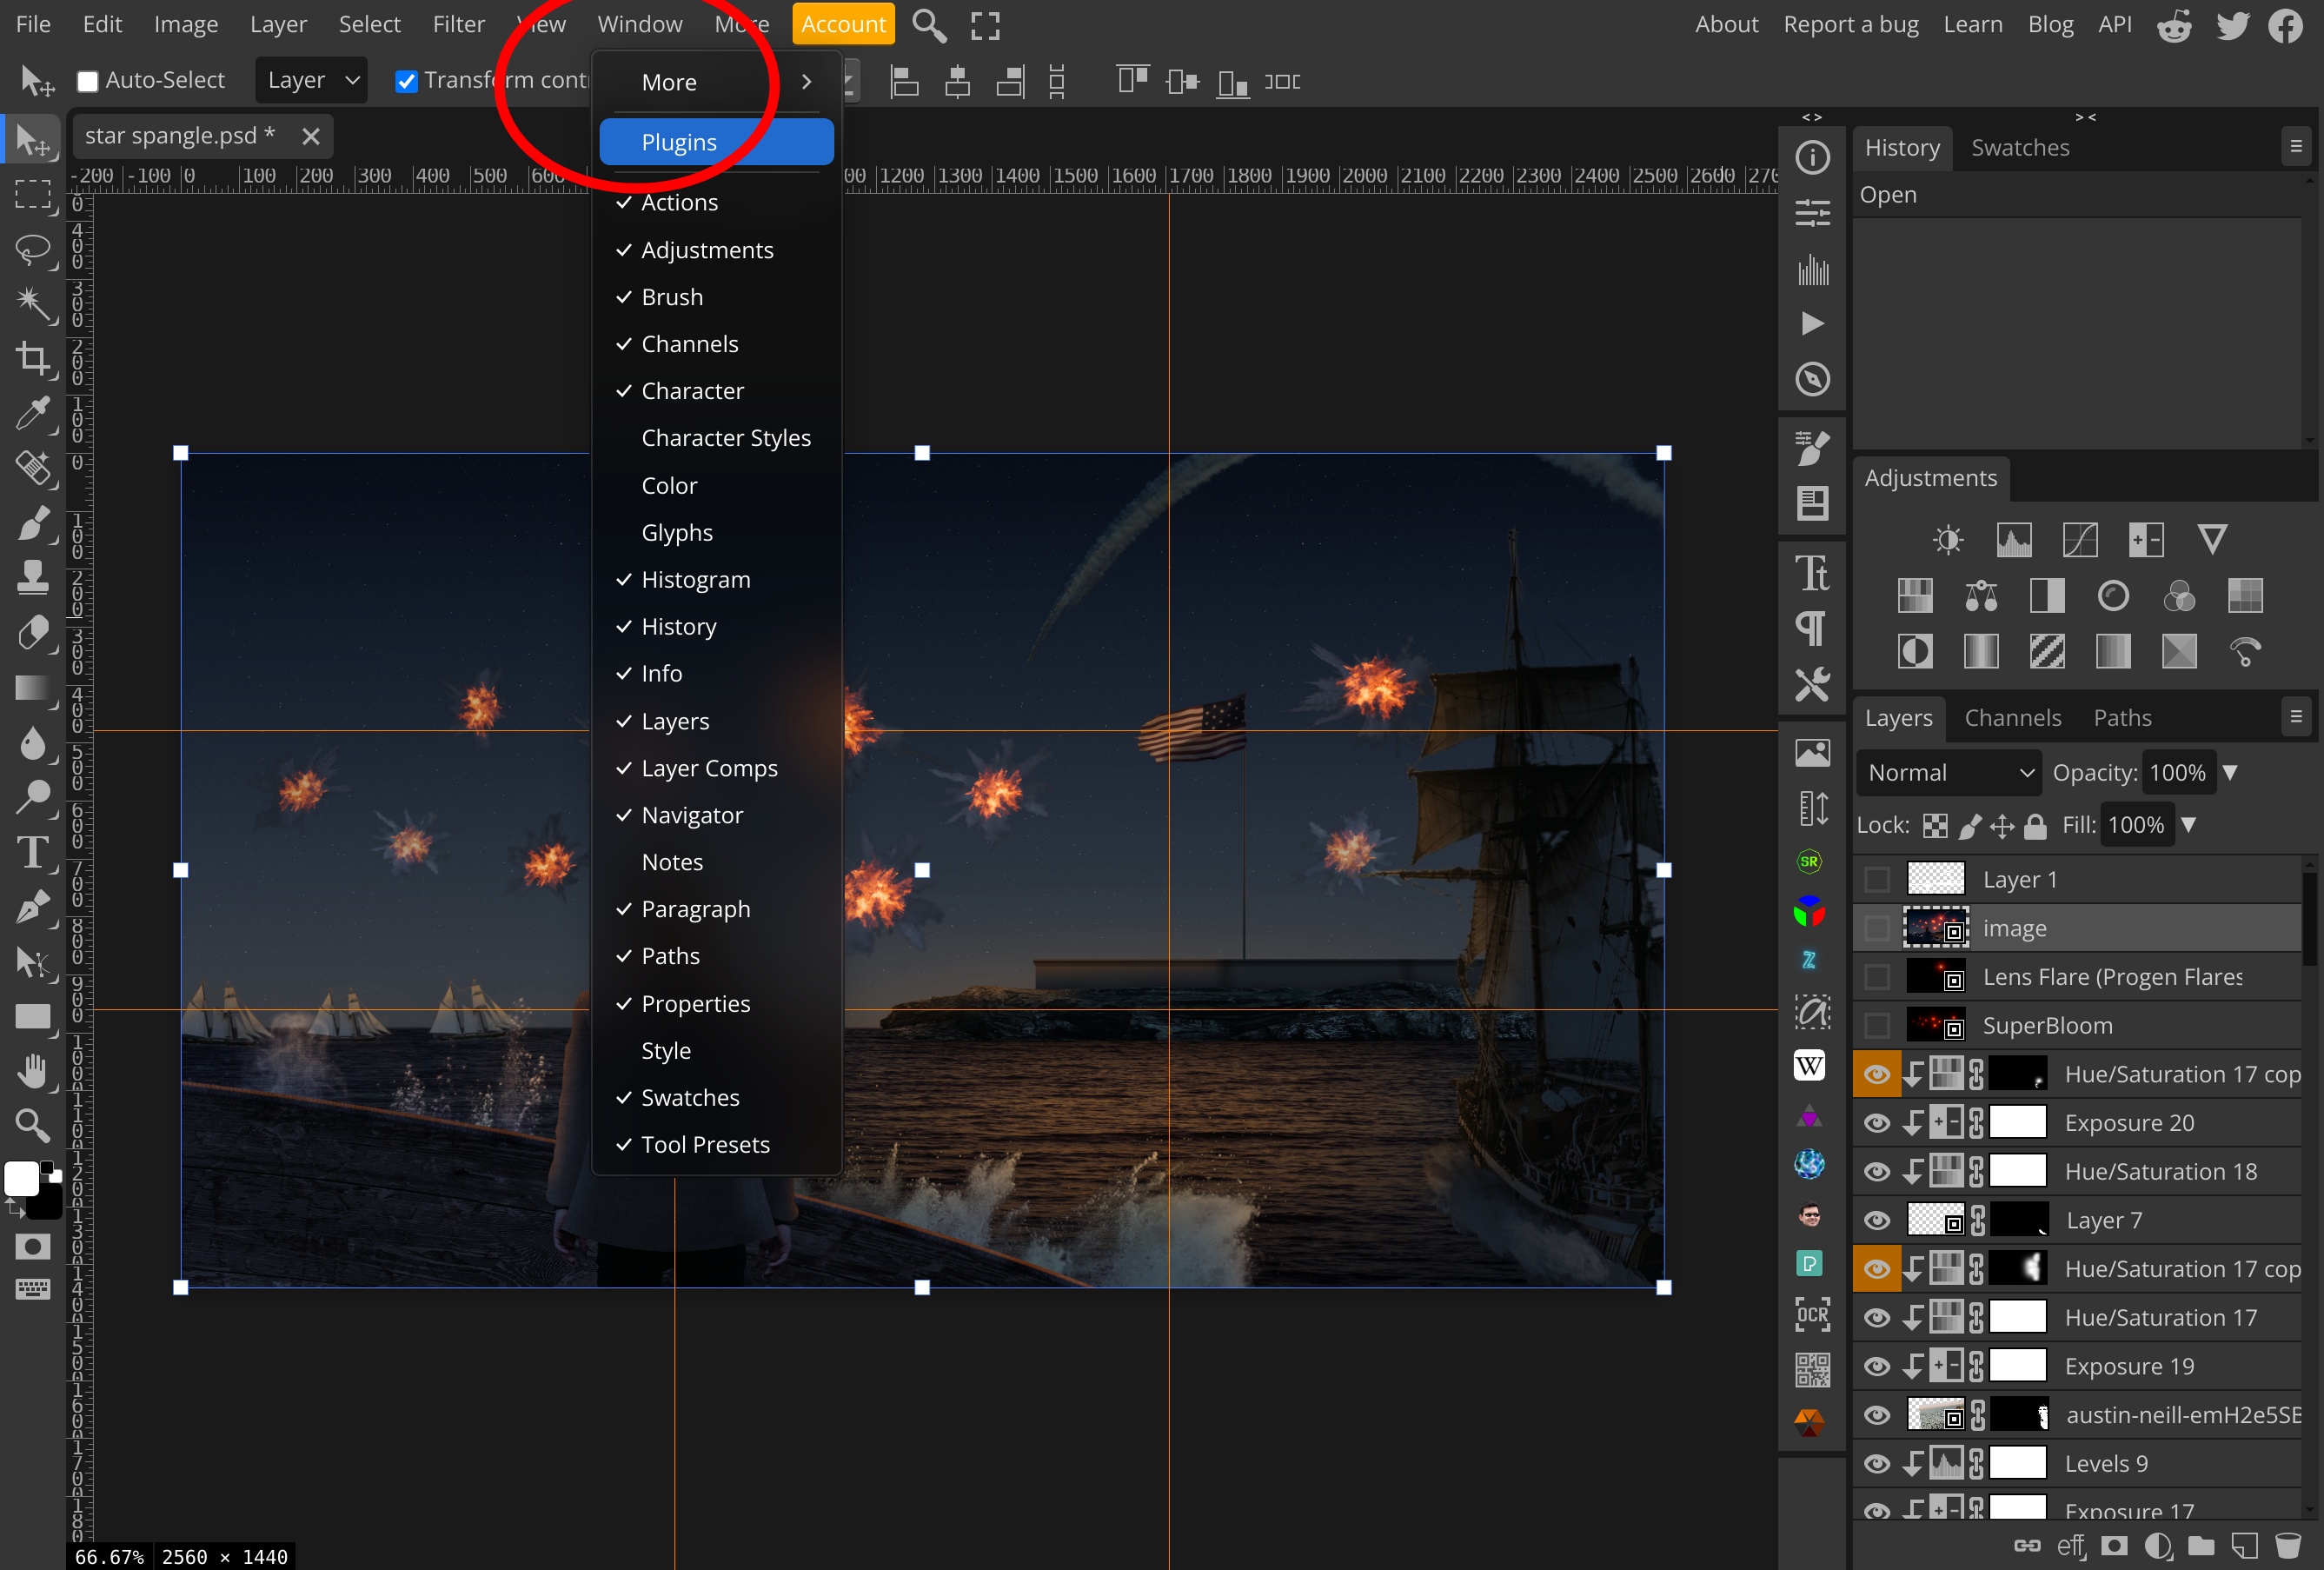
First off, open the Plugins menu from Window → Plugins. You will see a catalog of plugins developed by different people.
Step 2: Select Plugins
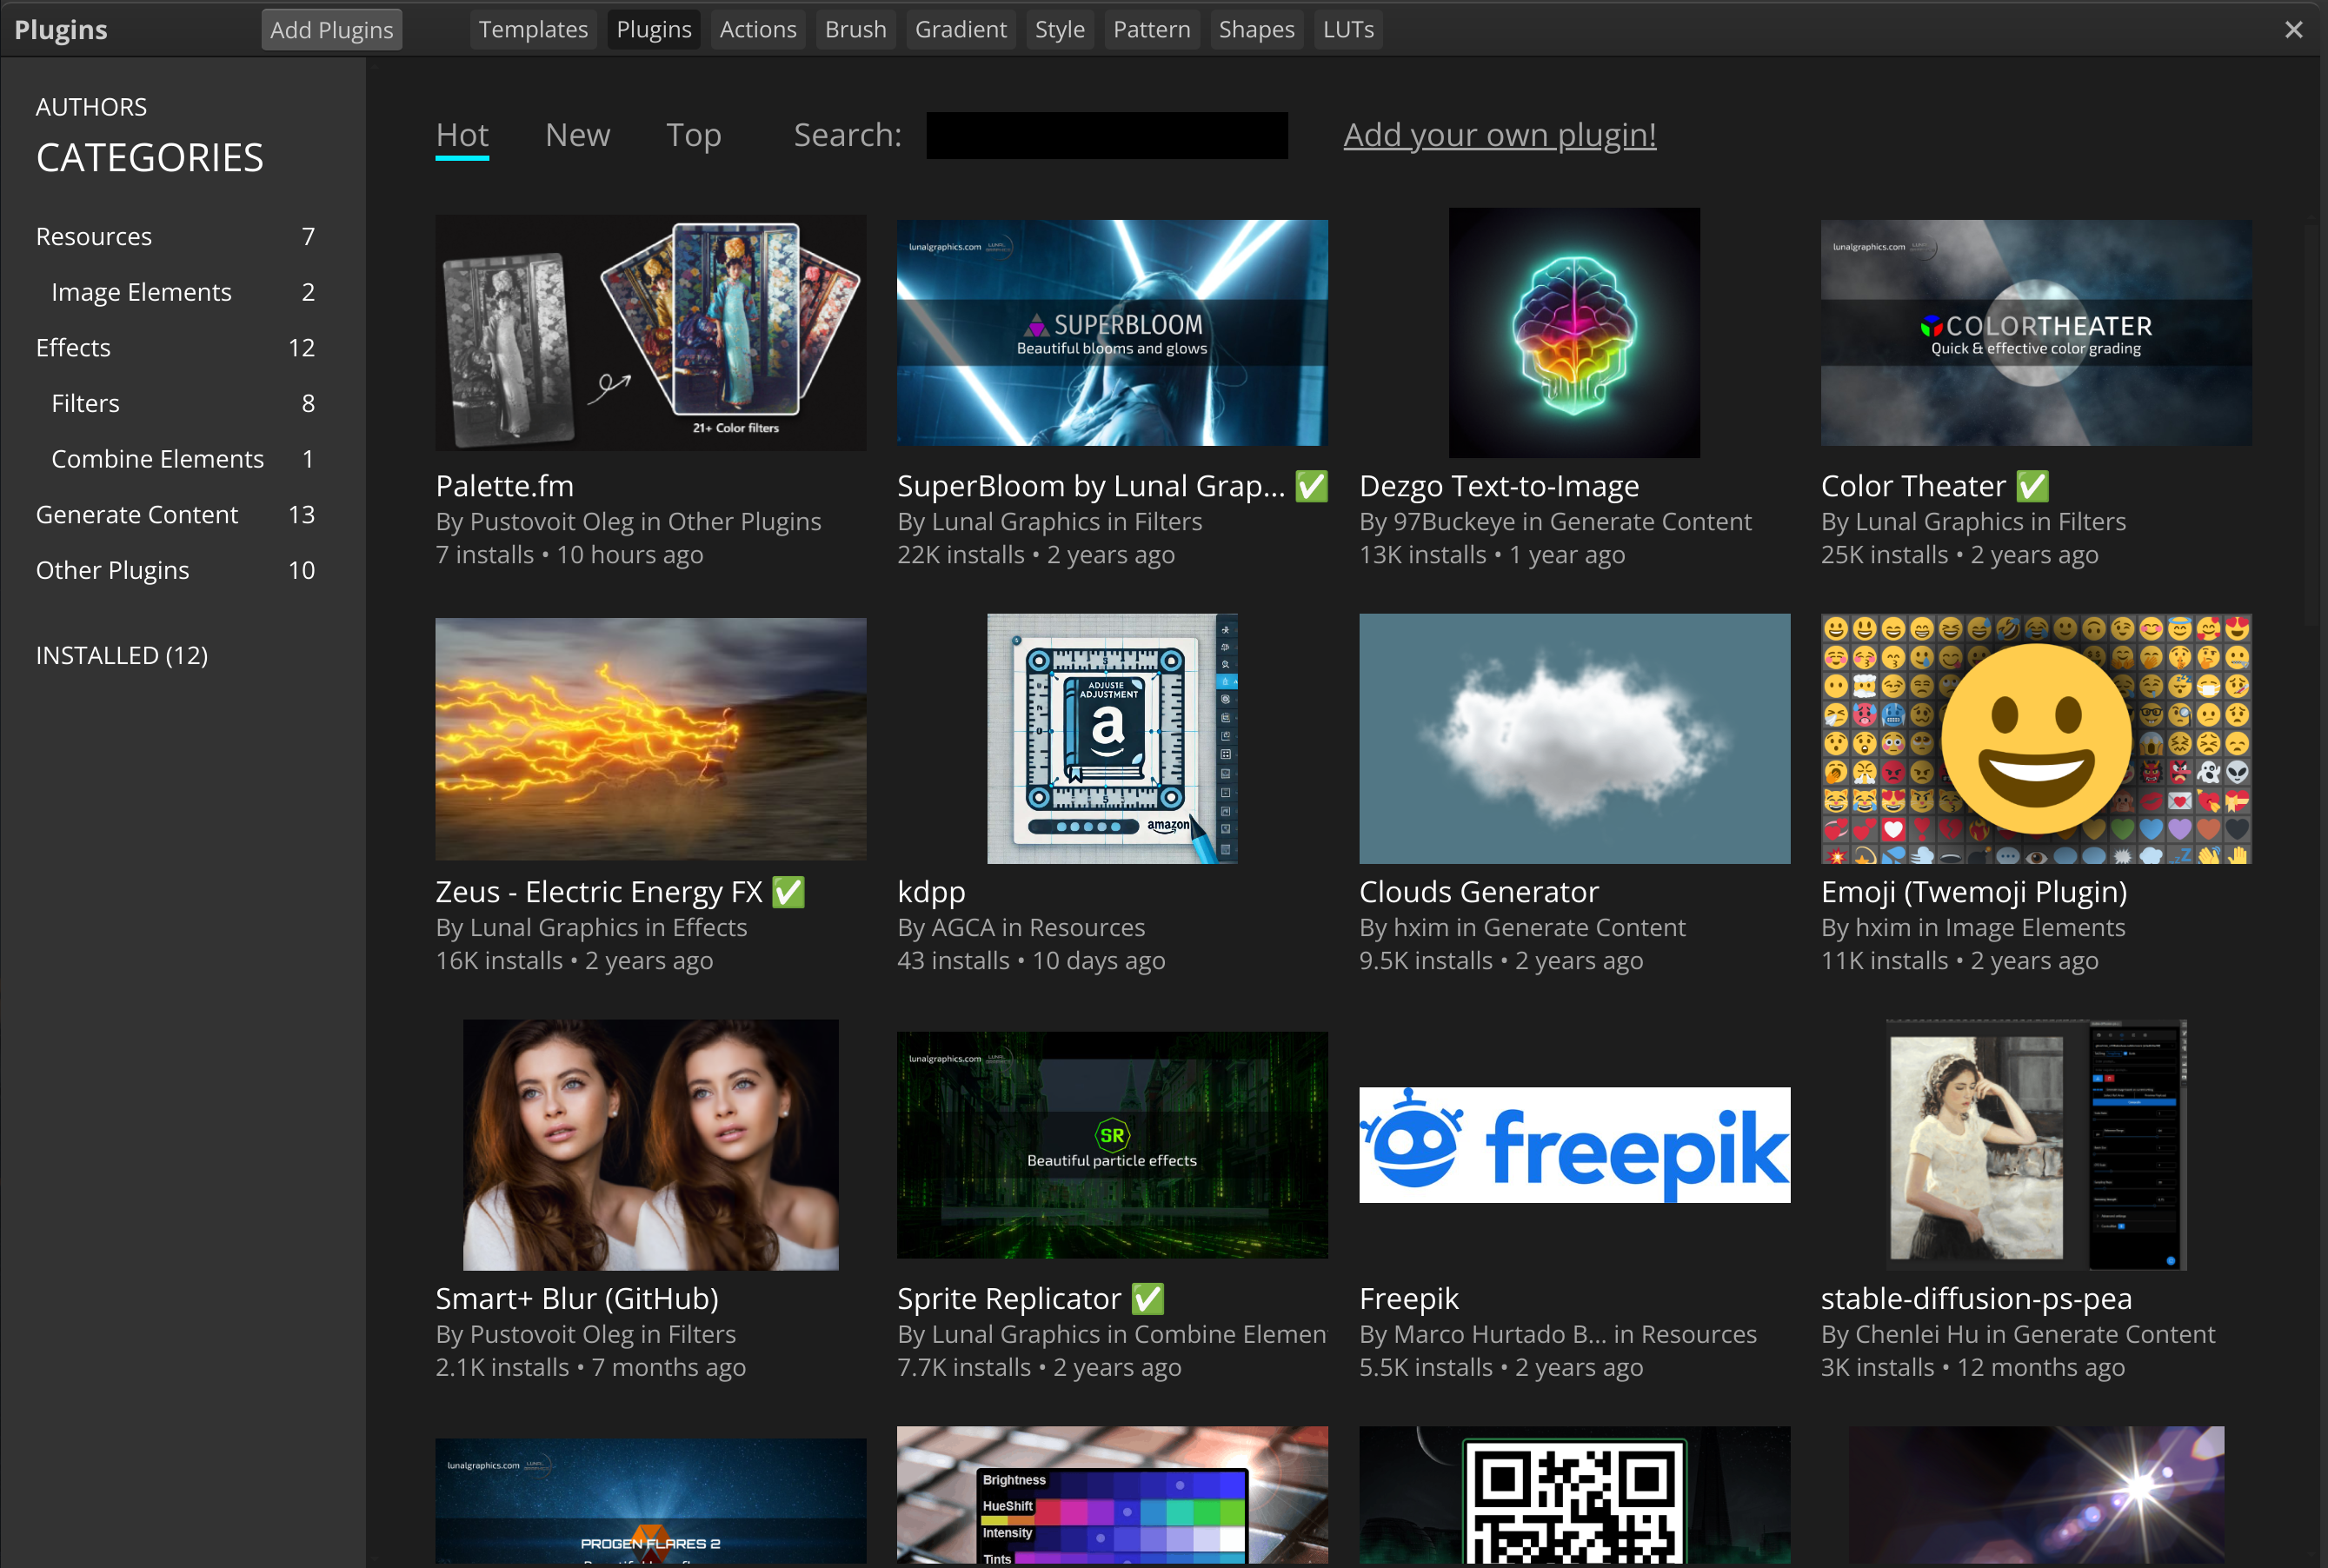
There are several ways to search for the perfect plugin. You can scroll through the catalog, or find a category from the left panel. Resources refers to plugins that help you import assets. Effects refers to plugins that generate effects based on your document. Generate Content plugins create new things from scratch, like charts and QR codes.
You can find Lunal Graphics plugins by typing "Lunal Graphics" into the searchbar at the top.
Step 3: Install
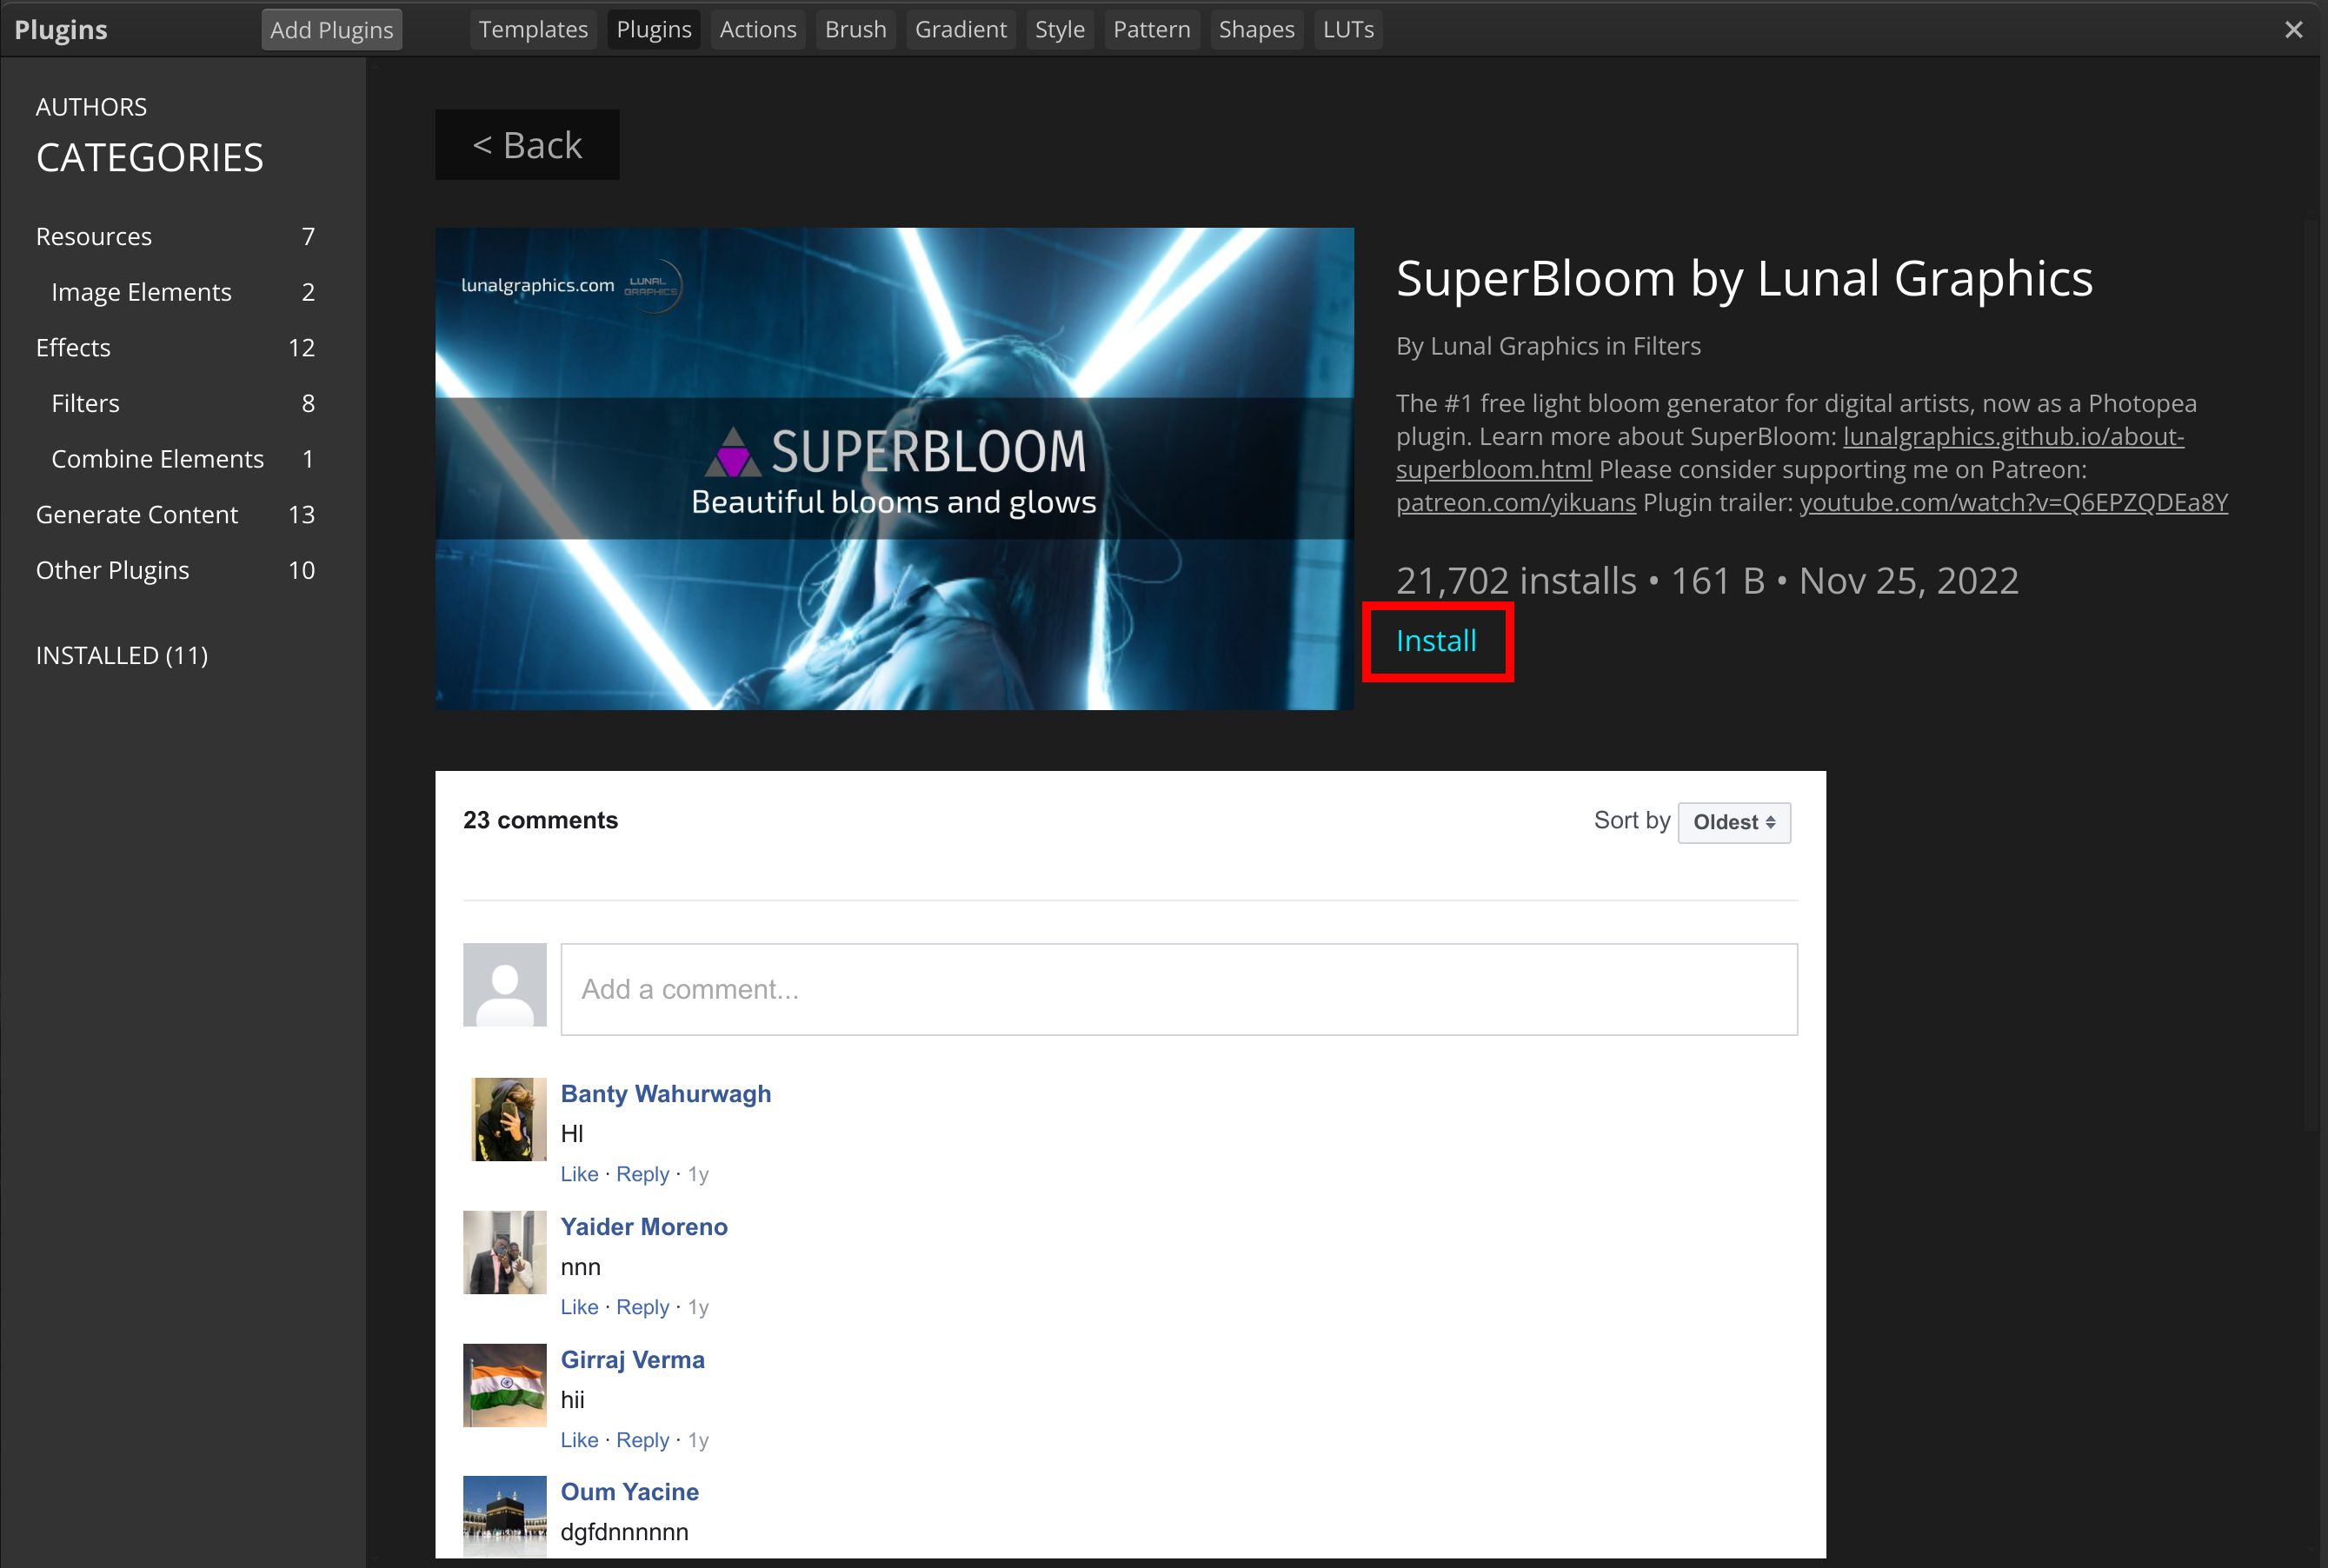
Once you've found a plugin you like, just click on its thumbnail and press Install.
Step 4: Use the Plugin
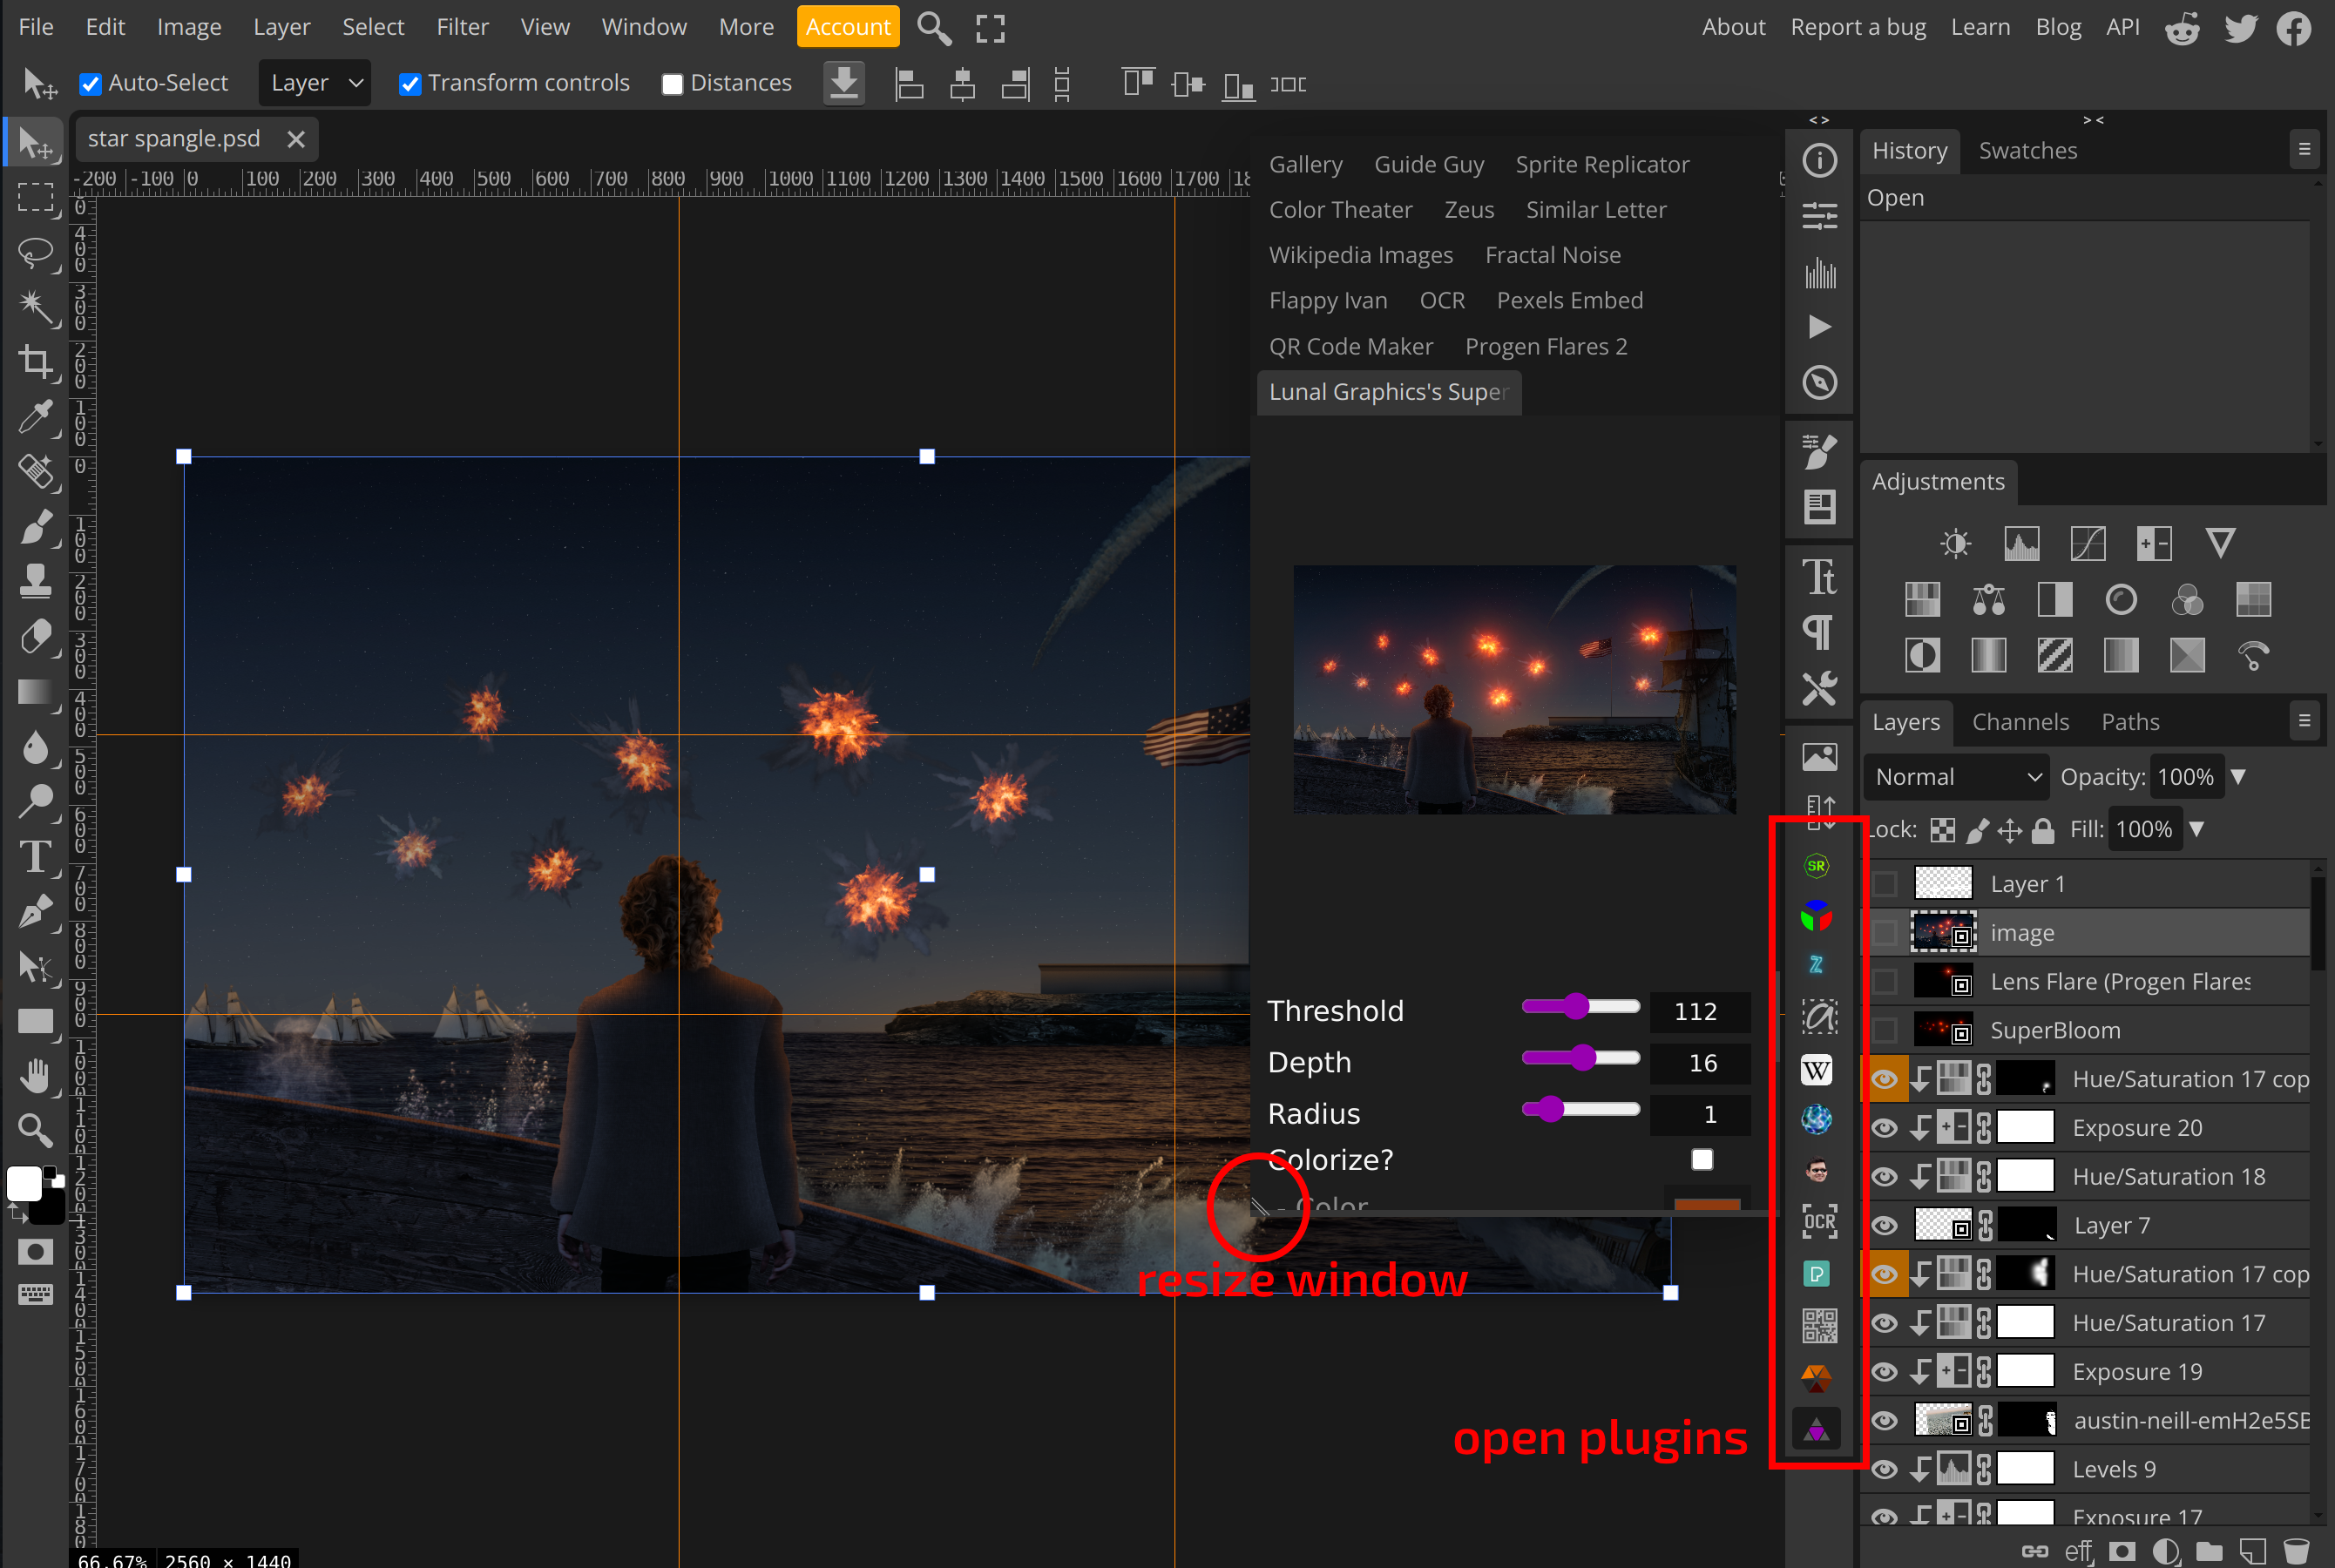
Close the Plugins menu using the X at the top-right corner. To open any plugin, click on its icon on the side panel (near the Layers panel). To resize the plugin window, use the handle at its bottom-left. :)